We accept:
Brunoise, chiffonade and julienne cuts: the ultimate guide to cutting vegetables
Don't have an account?
Creating an account has many benefits: check out faster, keep more than one address, track orders and more.
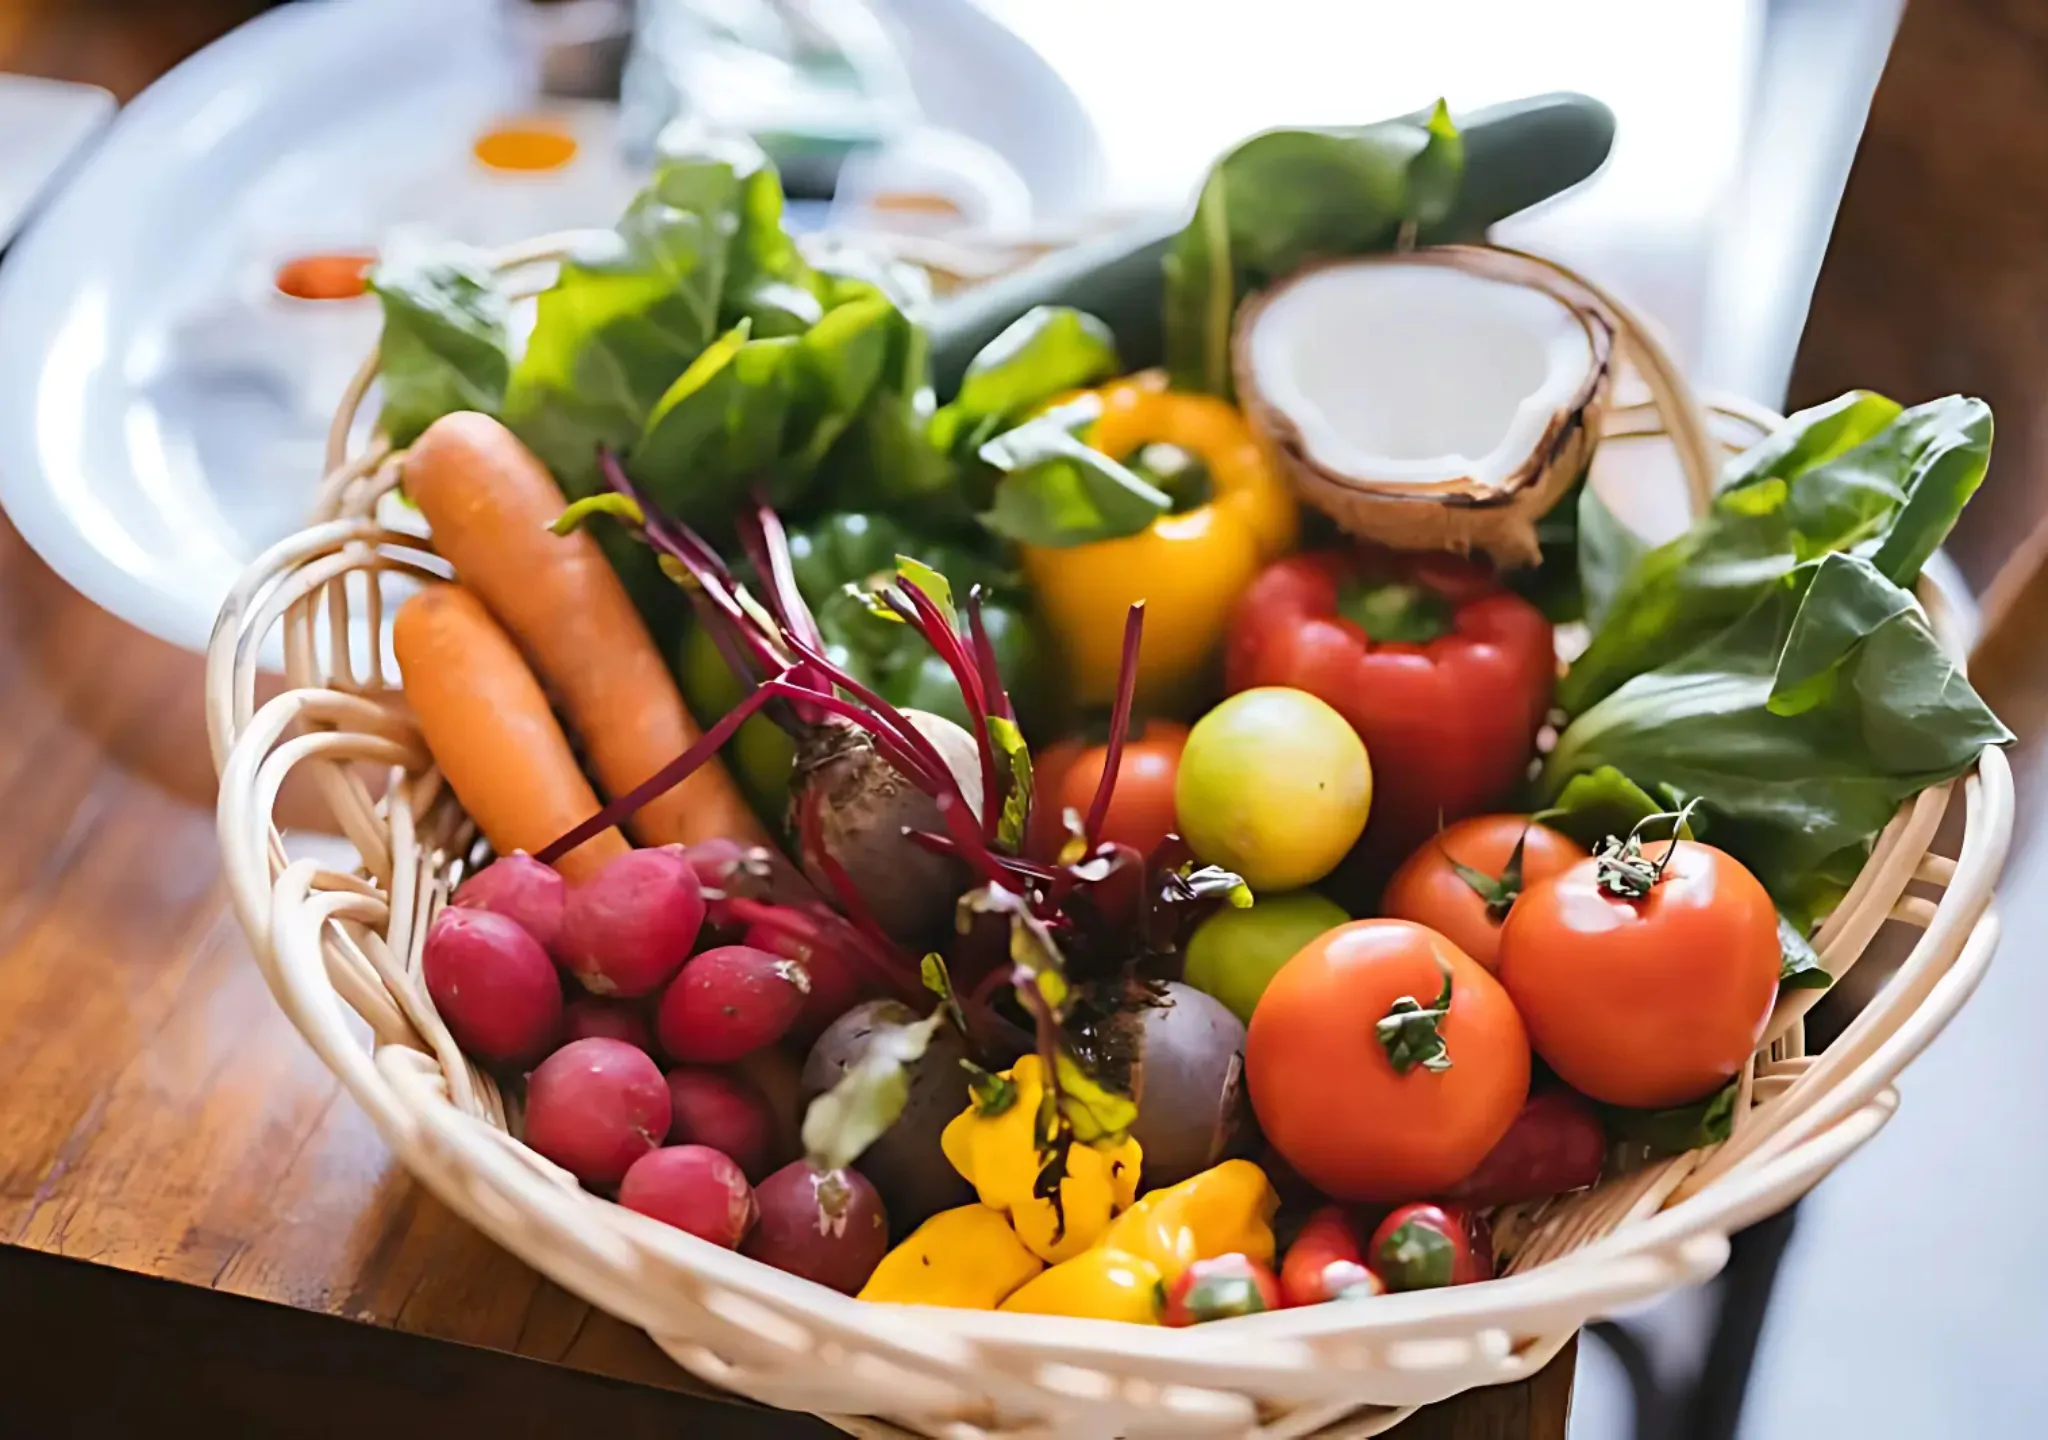
Chopping vegetables correctly is a fundamental skill in any kitchen. Whether you’re preparing a gourmet dish or simply trying to improve your food presentation, mastering the different cutting techniques can make a world of difference to your mise en place (that’s chef-speak for ingredient preparation).
But what are the different types of cuts, and when should you use them? In this guide, we’ll break down the three most popular cutting styles — the julienne cut, the brunoise, and the chiffonade. We’ll be covering everything you need to know to elevate your dishes, including:
- When to use the julienne cut
- The different ways of achieving a julienne cut
- How to julienne with a knife
- How to julienne with a peeler
- How to julienne with a mandoline slicer
- How to julienne with a food processor
The brunoise cut
- When to use the brunoise cut
- How to perfect the brunoise
- Which utensils to use for a brunoise
- What is mincing?
The chiffonade cut
- When to use the chiffonade cut
- How to chiffonade
The julienne cut
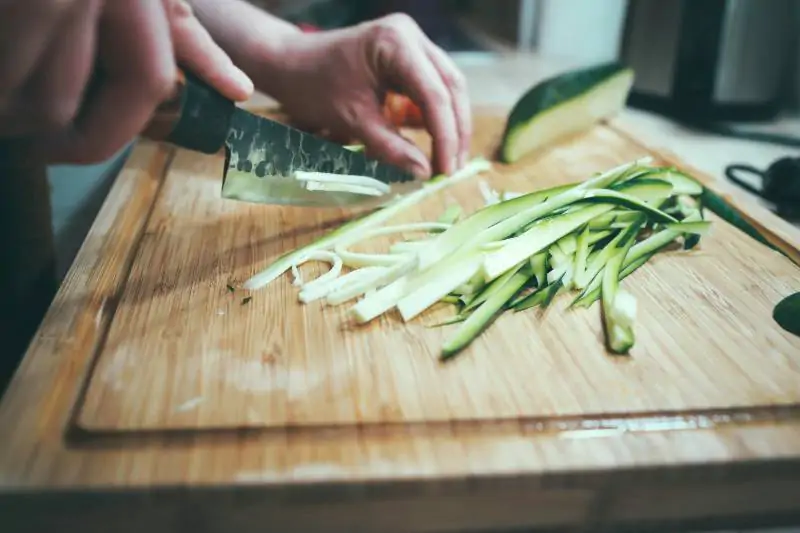
The julienne cut is one of the most common and versatile vegetable cutting techniques. It’s often used for vegetables that will be served raw, whether in salads, as crudités or as garnishes. The julienne cut is a popular choice for vegetables like carrots, peppers, courgettes and cucumbers.
The julienne cut involves chopping vegetables into thin, matchstick-like strips. In terms of cutting utensils, you have several options. You can julienne with a knife, a mandoline slicer, a peeler, or even a food processor.
When to use the julienne cut:
-
For salads: For crisp and fresh vegetables like cucumbers or carrots, julienne cuts provide a nice crunch and help the vegetables absorb dressings better.
-
For stir-fries: Thin strips cook quickly, making them perfect for throwing into stir-fry dishes.
-
For fritters: Likewise, the quick-cook quality of julienned carrots or courgettes makes them ideal for use in delicious fried vegetable fritters.
-
For garnishing: The uniformity of the julienne cut means it looks beautiful as a garnish for soups, meats, or salads.
Which method should you use?
When it comes to chopping vegetables, having the correct tools is just as important as the technique itself. The method you choose for your julienne cut will depend on your needs:
-
Knife: Works best for small quantities of food or when precision is key.
-
Peeler: Works well for softer vegetables, or when you're looking for a quick option with minimal prep.
-
Mandoline: Ideal for creating uniform cuts with a bit of extra speed, perfect for larger batches.
-
Food processor: The go-to method for when you’re working with large quantities, perfect for making julienne strips in no time.
How to julienne with a knife
The most common method of julienning is with a knife. A chef’s knife or paring knife is ideal since you’ll need precision to perform this fine cut. Make sure your knife is nice and sharp before starting, using a knife sharpener if necessary. Always select the right chopping board to perform your vegetable cuts.
-
Prepare the vegetables: Begin by washing your vegetables, and peel them if needed. Cut off both ends to create flat surfaces for stability.
-
Slice into planks: Cut the vegetable into even slices, about 3-4mm (or ⅛ to ⅙ inch) thick, depending on the desired julienne size. For example, if you're cutting a carrot, aim for slices that are roughly 3mm thick.
-
Stack the slices: Take a few slices at a time and stack them on top of each other. This will allow you to cut through several slices at once, making the process quicker and more consistent.
-
Cut into strips: Carefully cut the stacked slices into thin, uniform strips. Aim for strips that are about 3mm inch wide. Keeping your fingers tucked in and using a rocking motion with the knife will help to ensure even cuts.
How to julienne with a peeler
It’s recommended to use a julienne peeler to achieve a neat and uniform cut. While a regular peeler can be used in a pinch, your strips will come out inconsistent. Julienne peelers, on the other hand, come with a serrated blade with small teeth or grooves specially designed to produce thin strips. Some also come with interchangeable heads, so you can select your desired size prior to cutting.
Using a julienne peeler couldn’t be simpler. After washing and peeling your vegetables as you would with the knife method, simply select your desired cutting size, then hold the julienne peeler firmly and drag it down the length of the vegetable. The blade will create even julienne strips as you peel. Be sure to rotate the vegetable as you go, so that you’re taking cuts from all sides.
How to julienne with a mandoline slicer
A mandoline slicer is a tool designed to quickly and uniformly cut vegetables into different shapes, including the julienne. It is particularly useful for producing large quantities of julienned vegetables.
Many mandoline slicers feature adjustable blades, allowing you to control the thickness of your slices. Adjust the blade to a thin setting suitable for julienne strips. After you’ve prepared your vegetable for cutting, hold it securely and slide it across the mandolin's blade. Repeat until you've cut the entire vegetable into strips.
A few safety tips: mandolines can be sharp, so always be mindful while slicing. You might want to wear cut-resistant gloves to protect your hand from the blade, especially if you’re cutting a high volume of produce. It’s also a good idea to place a towel or non-slip mat under the mandoline to prevent it from sliding.
How to julienne with a food processor
For those who prefer a more hands-off approach, a food processor or vegetable slicer with a julienne blade attachment is a great choice. This method is fast and ideal for large quantities of vegetables.
To julienne with a food processor, first attach your julienning blade to the machine, ensuring it’s securely in place. Then, feed your vegetable into the feed tube (you may need to cut it into smaller pieces to fit). Finally, start the machine to produce your julienne strips. Depending on which type of food processor you have, this may be done by pressing a button or pushing down on a plunger to help the machine cut. Be careful not to have the machine’s settings too high — this can cause over-processing, which can turn your vegetables into mush!
The brunoise cut
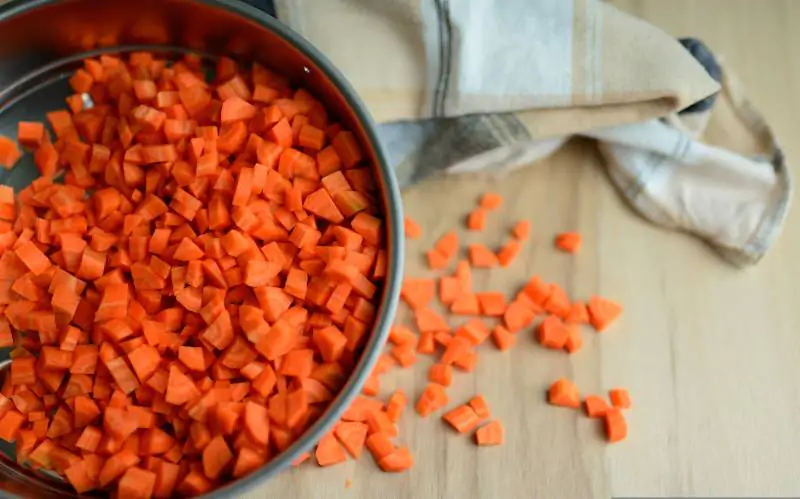
The brunoise cut is a technique used to produce small, even cubes. It’s sometimes known as dicing, due to the cubed vegetables resembling dice. This method is commonly used for finely textured ingredients that blend seamlessly into sauces, soups, stews, or dips. As one of the finest vegetable cuts, brunoise is particularly popular for vegetables like onions, carrots, and celery, where precision and consistency are key.
When to use the brunoise cut
-
For soups: The brunoise is often found in sofrito, mirepoix and consomme, which form the base of a variety of soups and stews. The cut allows vegetables to cook down quickly and evenly in soups, offering delicate flavour without large chunks.
-
For dips and salsas: Finely diced vegetables will blend into a smooth texture, ensuring an even distribution of ingredients.
-
Garnishes: Brunoise is perfect for adding an elegant touch to dishes, like sprinkling diced vegetables over meat or salads as a garnish.
How to perfect the brunoise
Your starting steps are similar to that of the julienne cut. Begin by peeling and trimming the vegetable into a rectangular shape for stability. Then, slice the vegetable into thin, uniform planks, about 3mm inch thick. Stack the planks neatly and cut them into matchstick-like strips, ensuring that they are also about 3mm wide.
Now, here’s where the technique differs: rotate the vegetable strips, then slice them horizontally into small, even cubes. A traditional brunoise cube measures about 3 x 3mm. However, the finer your dicing, the better your vegetables are for achieving delicate textures in a dish.
Which utensils to use for a brunoise
For fine types of cuts like the brunoise, a paring knife is ideal. Equally, you could use a sharp chef’s knife. Like with a julienne cut, you can also use a mandoline or a julienne peeler to create your initial strips, though you will need to perform the final dicing by hand. For larger quantities, a food processor with a dicing attachment will do the trick, however, it may not offer the same level of precision as a knife.
What is mincing?
In comparison to dicing, mincing creates much smaller pieces, almost creating a paste-like consistency. The technique is often used for aromatic ingredients that need to blend seamlessly into the dish, such as garlic, ginger or fresh herbs.
To mince vegetables with a knife, start out the same way as you would for a julienne or brunoise cut. When you have your thin strips, rock the knife back and forth across them until your vegetable has been minced to your desired consistency.
You can use a sharp chef’s knife or paring knife for this cut. Alternatively, a mincing knife has a small, curved blade that can help perform the rocking motion needed to achieve a fine mince.
The chiffonade cut

The chiffonade cut is a technique primarily used for leafy greens such as spinach or lettuce, as well as herbs like basil and mint. The method creates long, delicate ribbons that are ideal for garnishing. As well as being visually appealing, the chiffonade helps tenderise leaves and release flavour, adding a light, fresh touch to dishes.
When to use the chiffonade cut
-
For salads: Use chiffonade-cut herbs or greens for a light, airy texture that mixes well with other salad ingredients.
-
For pasta and sauces: When cut in a chiffonade style, fresh herbs like basil will infuse your sauces with a delicate, aromatic flavour.
-
For garnishes: The visually appealing ribbons of a chiffonade make it a great choice for garnishing dishes like soups, risottos, or roasted meats.
How to chiffonade
The best tools to use for this method are a sharp chef’s knife and a cutting board. A food processor is not advised for this cut, as the machine’s blades will not produce a precise cut and could bruise and tear delicate leaves.
To start, remove the leaves of your greens or herbs from their stems, discarding any woody ends. Stack the leaves on top of one another into small piles, a few leaves high. Roll each of your piles up tightly into a cigar-like shape. Then, slice crossways across the rolled up leaves, cutting them into thin strips around 3mm wide. The results should be long, thin ribbons.
For delicate ribbons, you can use the knuckle of your guide hand as a buffer, placing it parallel and flush to the blade as you cut. This will ensure your slices aren’t too big. Make sure your fingertips are out of the way of the blade at all times.
Which cut should I use?
If you’re still not sure which method to use, here are our three cutting techniques at a glance:
|
Cut: |
Julienne |
Brunoise |
Chiffonade |
|
Result: |
Thin, matchstick-like strips |
Small, uniform cubes |
Thin, delicate ribbons |
|
Best for: |
Carrots, courgettes, cucumbers, and bell peppers |
Carrots, potatoes, onions, celery, and turnips |
Leafy greens and herbs |
|
Dishes: |
Crudites, salads and garnishes |
Soups, stews and dips |
Salads and garnishes |
|
Equipment needed: |
A sharp knife, julienne peeler, mandoline slicer or food processor |
A peeler or mandoline slicer, and/or a sharp knife |
A sharp knife |
So, now you know everything there is to know about cutting vegetables. Whether you’re preparing a simple salad, a hearty pasta dish, or an intricate gourmet meal, incorporating these vegetable cuts will help elevate your cooking to the next level.
Ready to chop? Here at Mitchell & Cooper, we have all the appliances and kitchenware you need to achieve your perfect vegetable cuts. Or, head to our knowledge hub for more how-to guides, recipes and top tips.